Embarking on a sewing or pattern-making project requires a keen eye for detail and precision. One indispensable tool that can elevate your craftsmanship is the needle point tracing wheel.
This unassuming hand tool plays a pivotal role in transferring patterns onto fabric or paper with unparalleled accuracy, making it a must-have for both novice and experienced crafters.
Understanding the needle point tracing wheel
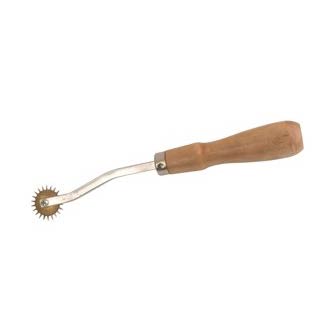
The needle point tracing wheel is a small, handheld tool with a wheel at its center, which is equipped with tiny, sharp needles. The needles are strategically placed to penetrate the paper pattern or fabric and transfer the design onto the material beneath it. This ensures that your design is accurately marked for cutting or stitching, leading to precise and professional-looking results.
Step-by-step guide to using a needle point tracing wheel
The steps below describe how to transfer a paper pattern design to fabric.
- Prepare Your Materials: Before you start, gather all the necessary materials. This includes your fabric, paper pattern, and the needle point tracing wheel. Ensure that your fabric is laid out on a smooth and flat surface.
- Position the Pattern: Place the paper pattern on top of the fabric, aligning it according to your project’s requirements. Secure the pattern in place with pins or weights to prevent it from shifting during the tracing process.
- Choose the Right Wheel: Needle point tracing wheels come with different types of wheels, each designed for specific fabrics or projects. Select the wheel that best suits your material to ensure optimal results.
- Adjust the Pressure: Depending on your fabric type, adjust the pressure you apply to the tracing wheel. For delicate fabrics, use a lighter touch, while heavier fabrics may require a firmer pressure. Practice on a scrap piece of fabric to find the right balance.
- Begin Tracing: Hold the needle point tracing wheel like a pen, keeping it at a comfortable angle. Start tracing the pattern by rolling the wheel along the lines of the pattern. Be sure to cover all the necessary lines with the wheel to achieve complete and accurate markings.
- Check Your Progress: Periodically lift the paper pattern to check the transferred markings on the fabric. Ensure that all key lines and markings are visible and clear. If any areas are missed, go back and retrace them.
- Finishing Touches: Once you have traced the entire pattern, remove the pattern paper from the fabric. If necessary, use a fabric marker or chalk to enhance or mark specific points for reference during the sewing or cutting process.
- Care and Maintenance: After use, clean the needle point tracing wheel by removing any fabric fibers or debris that may have accumulated. Store it in a safe place to prevent damage to the delicate needles.
Get a Needle Point Tracing Wheel
Need a needle point tracing wheel for your sewing projects?
Find this and other tools in the Ronkita Shop
Benefits of Using a Needle Point Tracing Wheel
- Precision: Achieve unparalleled accuracy in transferring intricate patterns onto your fabric.
- Time Efficiency: Save time by swiftly and accurately marking your fabric for cutting or stitching.
- Versatility: Suitable for a wide range of fabrics and projects, making it a versatile tool for any sewing or pattern-making enthusiast.
- Professional Results: Elevate the quality of your projects with professional-looking results that showcase attention to detail.
In the world of sewing and pattern-making, precision is key, and the needle point tracing wheel emerges as an invaluable ally. With its ability to seamlessly transfer intricate designs onto fabric, this hand tool opens up a realm of possibilities for creators of all levels. By mastering the art of using a needle point tracing wheel, you’ll not only enhance the accuracy of your projects but also elevate the overall quality of your craftsmanship. So, roll on with confidence and let the needle point tracing wheel be your guiding hand in the world of precision sewing.
Learn to Sew
Want to learn more about how to use this and other tools? I offer beginner to advanced sewing classes.
Explore more sewing guides and tutorials.